Access to the Institute for Mathematic's wireless network (WLAN) with Microsoft Windows Vista
In order to use the Mathematical Institute's wireless network and surf the web, you have to add your access certificate and set up the network access. For higher connection speeds you can additionally configure the proxy-settings in your webbrowser.Adding the certificate
Double click on thecert.p12 file you were sent, either directly in your mail program or wherever you saved it. The Certificate Import Wizard will be launched: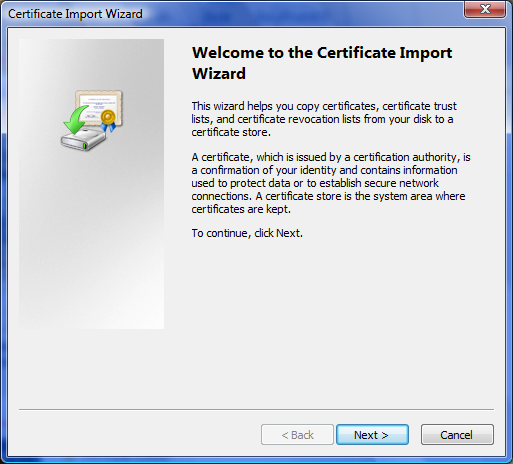
Click Next
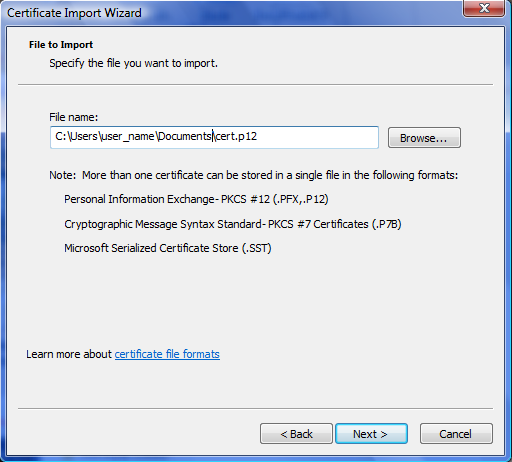
Leave the file name unchanged and click Next
In the next window you will be aske for a password. Unless you were told differently, enter
WLAN
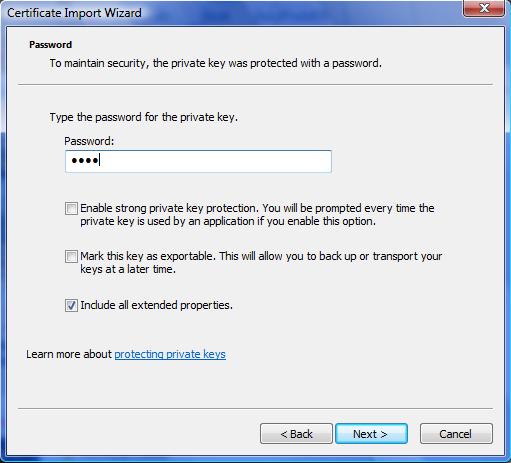
and click Next. Another window in which you will be asked where to store the certificate will open:
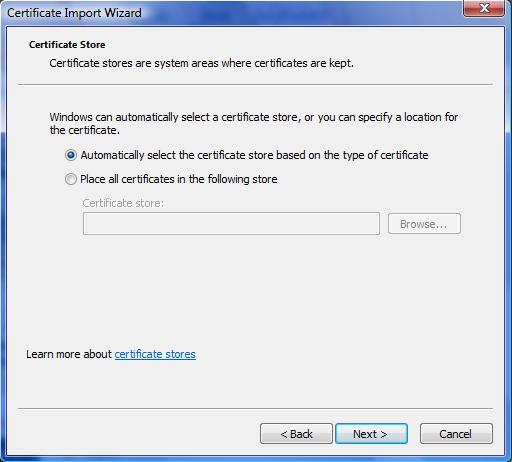
Keep the default setting and click Next
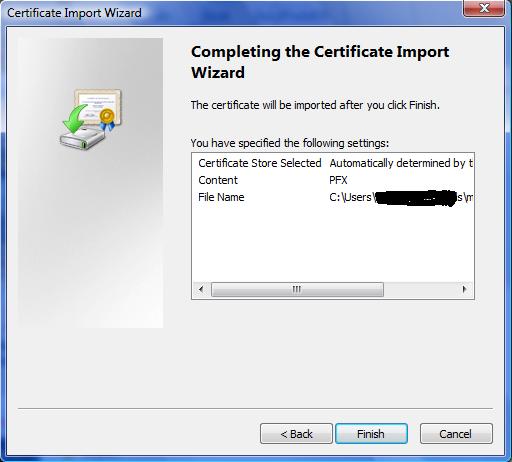
Click Finish and confirm the following OK dialogue.
Setting up network access
In order to set up network access, proceed as follows: Open the Control Panel
and select „Network and Internet“
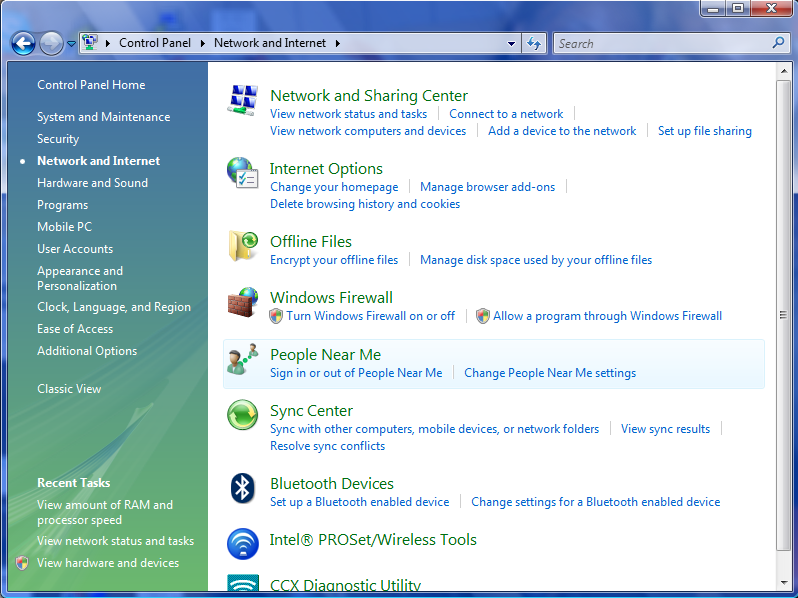
and in this new window select „Network and Sharing Center“
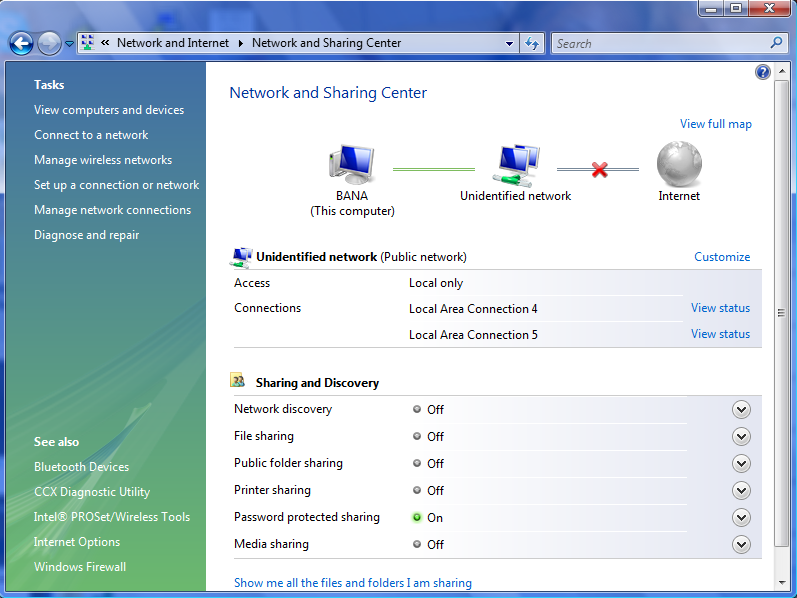
Select „Manage wireless networkds“ from the list on the left
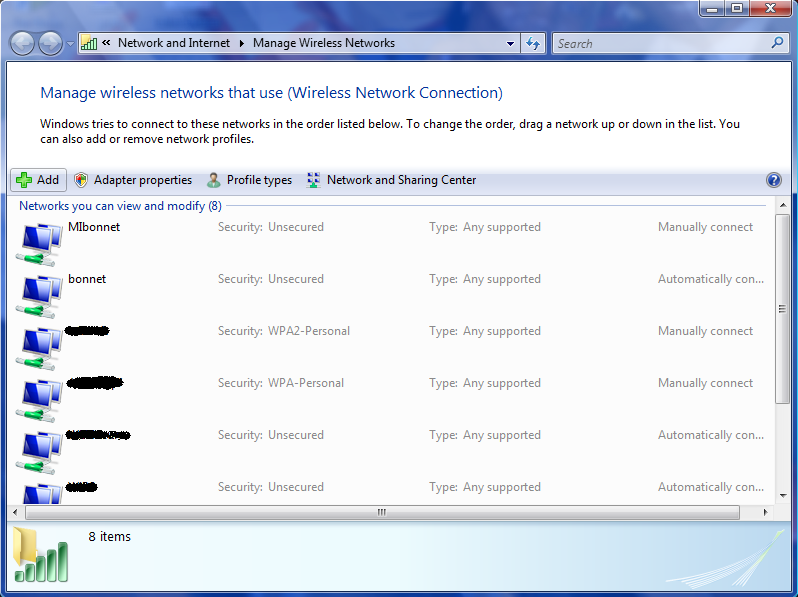
Click „Add“
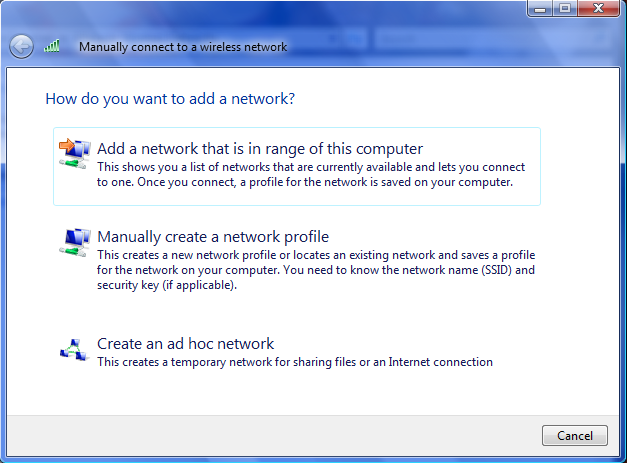
and select the middle option „Manually create a network profile“.
Enter „MI“ as network name and select the security type „WPA2-Enterprise“. The encryption type has already been correctly set to „AES“ by default. The field „Security Key/Passphrase“ is left empty:
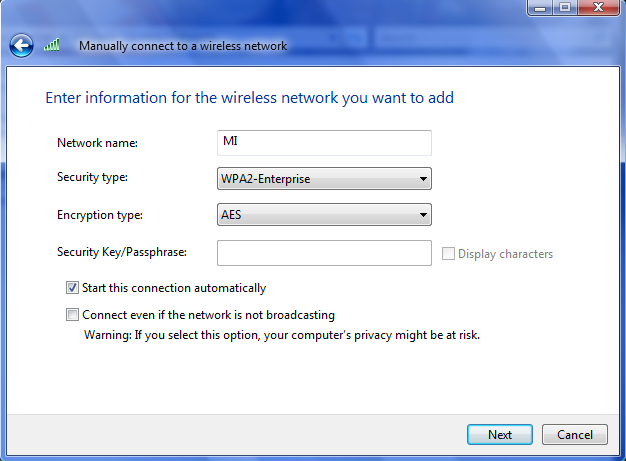
Click „Next“
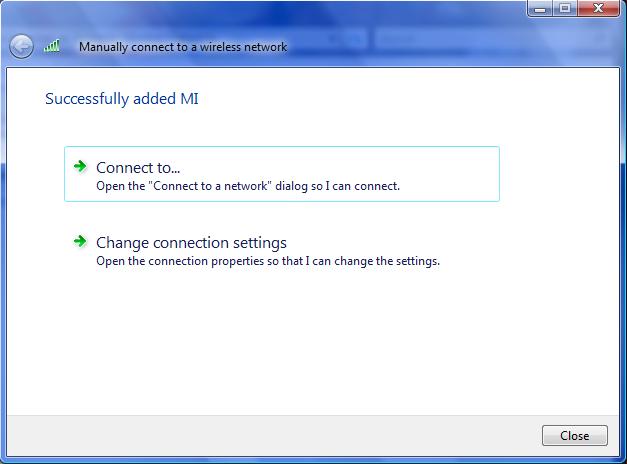
and select „Change connection settings“ and then „Security“ in the next window:
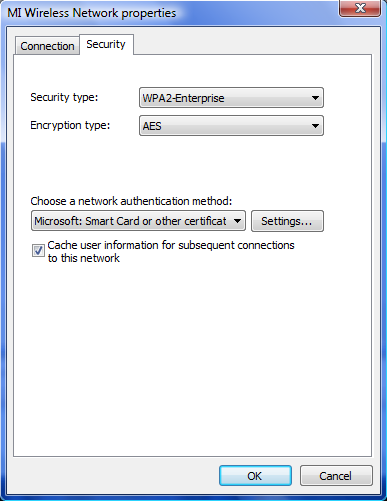
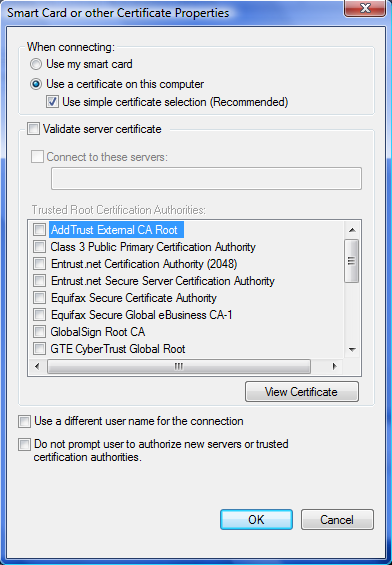
Under „Choose a network authentification method“ select „Microsoft: Smart Card or other certfificate“.
Click on „Settings“ and uncheck the box next to „Validate server certificate“:
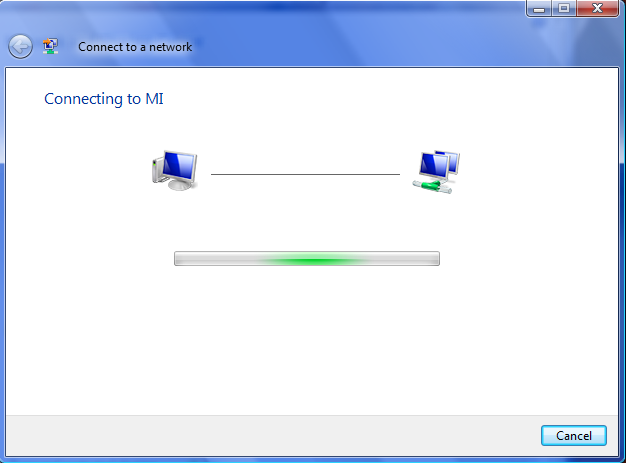
Click „OK“ in this and the window under it until you are back to the „Manually connect to a wireless network“ window. Now select the upper option „Connect to…“. Should the connection not be established automatically, select the network MI and click Connect. For a few seconds the following message should appear:
If everything is working correctly, the status next to the network name „MI“ in the following window
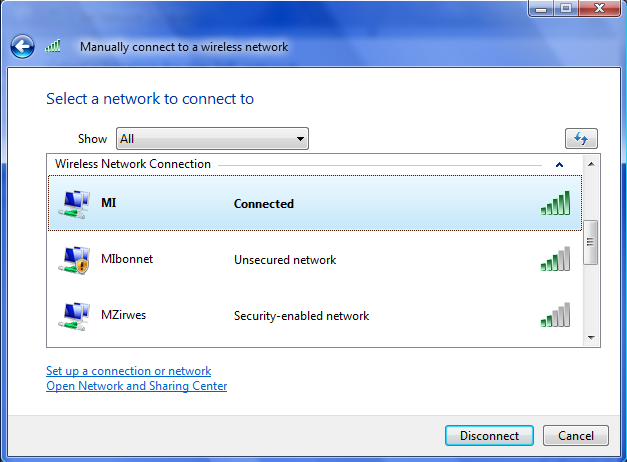
should read „Connected“.
News
Gerd Faltings awarded Abel Prize 2026
Tingxiang Zou to lead a new Emmy Noether group
Tasho Kaletha awarded Chevalley Prize in Lie Theory 2026
Christoph Thiele awarded Brouwer Medal 2026
Christoph Thiele and Floris van Doorn awarded ERC Synergy Grant
Henning Heller receives Montucla Prize 2025
Thoralf Räsch receives Fakultät teaching award